How to Upload Screens to Zeplin Project

A Guide to Zeplin 🚀
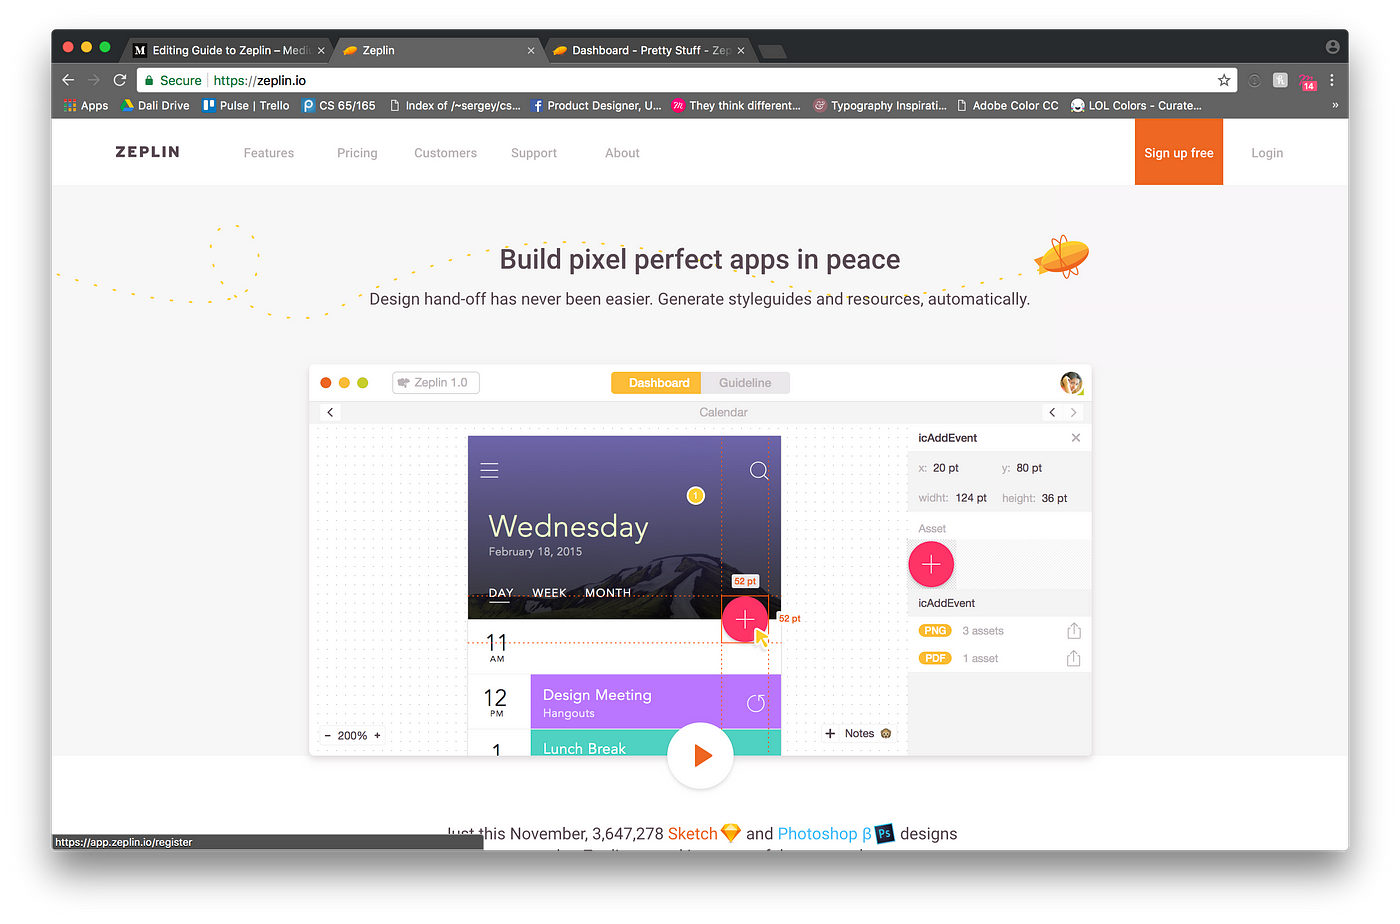
Design Handoff Made Easy
Zeplin is a handy great tool for better advice between designers and developers. Past converting designs fabricated in Sketch or Figma to a code-friendly format, Zeplin can aid your project exist more than organized and save anybody'south time!

Install + Create Account
Go to the Zeplin webpage and create an account by clicking on the "Sign upward free" button on the superlative. Everyone needs an account so that you can be given access to specific projects.
There is a web app, simply if yous're a designer, you lot volition need to download the Mac or Windows app to export from sketch. Download the app from the bottom of the webpage.
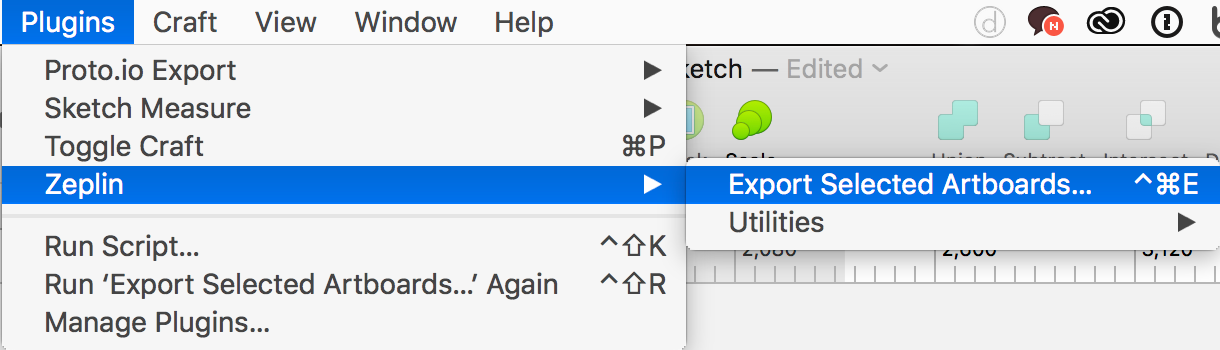
Once you download the app, the Sketch plugin should be installed automatically. If non, go to this page to download the plugin manually. When you're ready to export, select screens and utilize Plugins > Zeplin > Consign Selected Artboards or the shortcut ⌃ + ⌘+ E to transport to Zeplin.
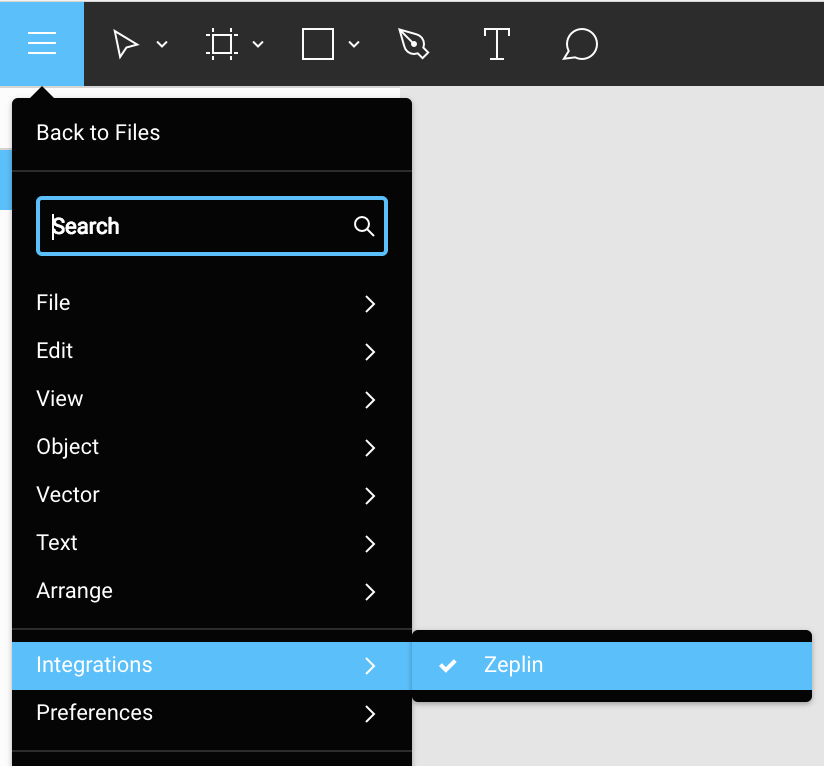
For Figma, you have to add an integration to specific pattern files. Get to a specific projection, click the hamburger menu and turn on Integrations > Zeplin. Turning this on volition give you the option to export screens to Zeplin through the export part (⌥/Alt + Due east or the export push button on the right top corner).
Create/Add Project
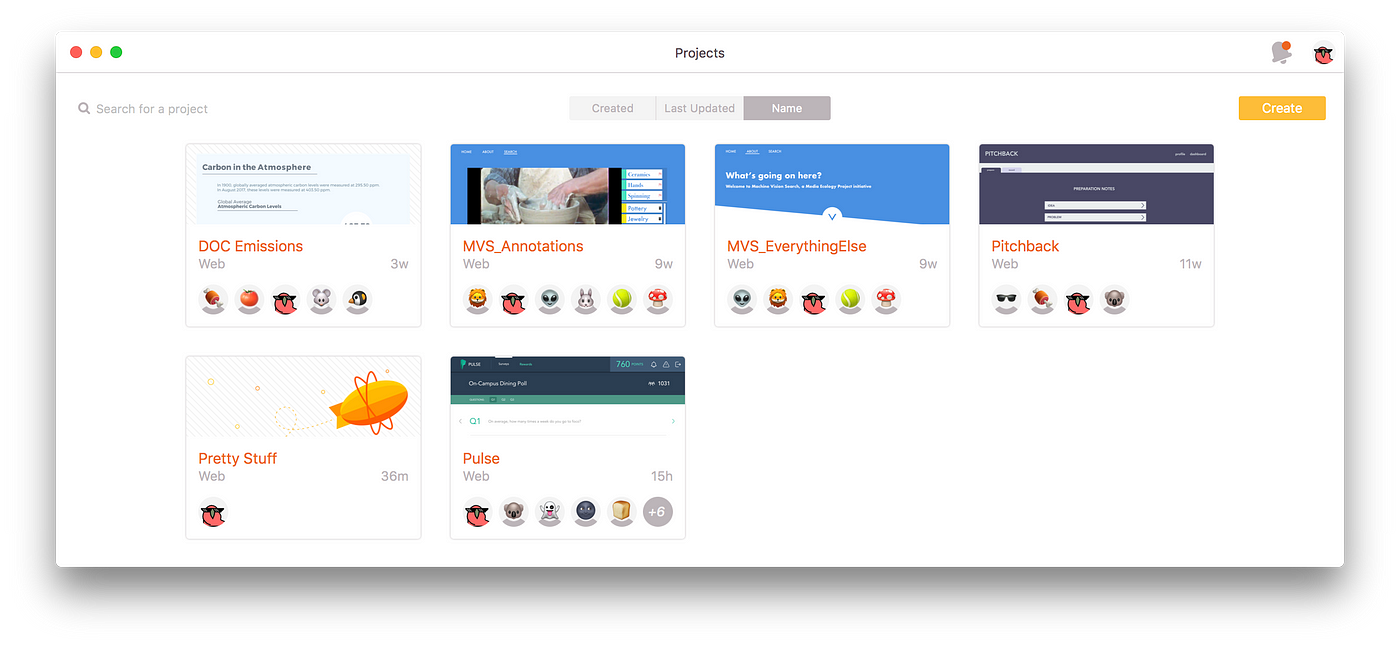
After logging in, yous volition be directed to your Projects screen. Here, you lot can run into all the projects yous are involved in or create a projection. Your Project Managing director or Core Mentor may have already created a project. In this case, you can ask the owner of the project to grant yous access to the project.
When you create a project, you are given the choice to choose the format. Choose accordingly to what kind of platform your app will be using.
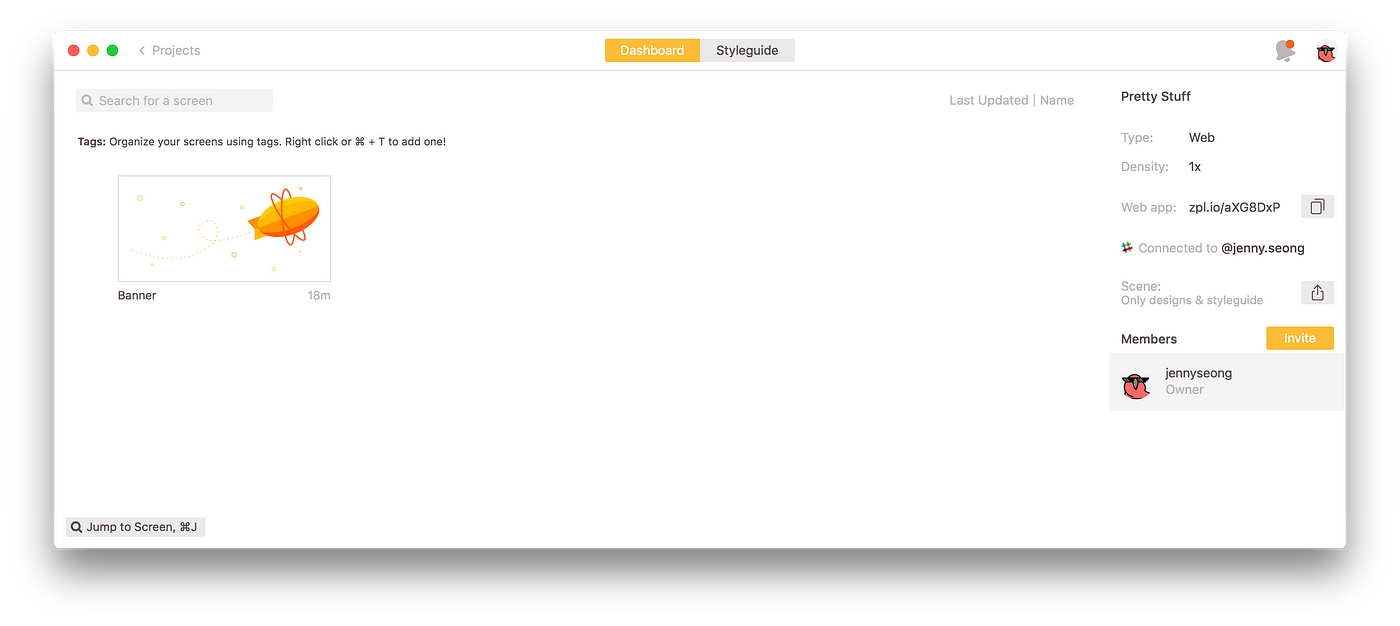
After you create a projection or are invited to interact on one, you lot tin get into a specific project's Dashboard by double-clicking on them. On the right, you will see the details of your project and a list of members who have access to this project. Let'due south telephone call this the Inspector for future reference. You can add your squad members with their email or username here.
Slack Integration
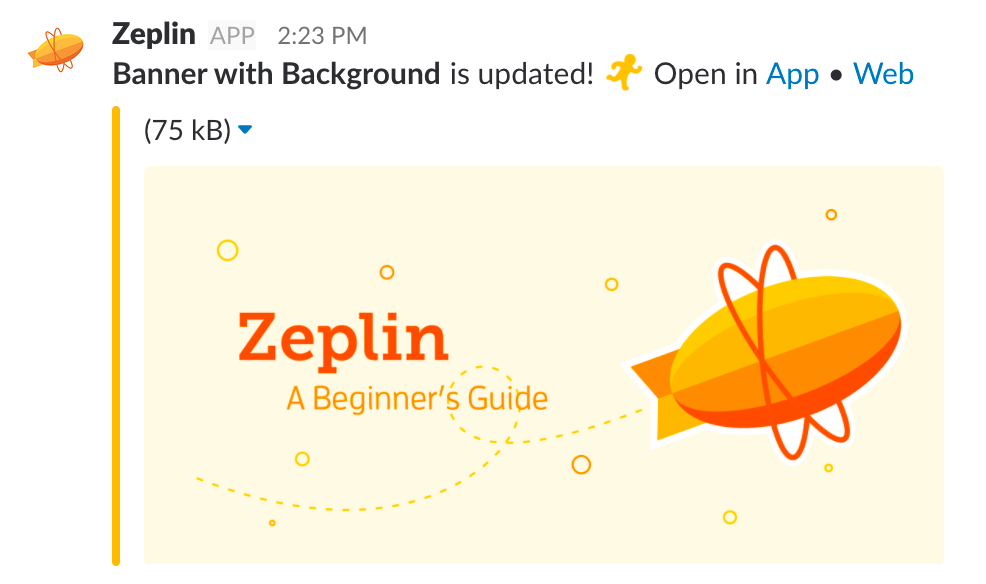
Slack integration allows the app to post automatic notifications to your slack channel. Whenever a comment is posted, a color is added to the mode guide, or a screen is updated… your channel volition be notified with a link direct to the project.
You can customize when the aqueduct is notified by going into Preferences when you click on the settings wheel ⚙ next to the Slack integration function. Select the relevant categories for your squad to make sure not to spam your channel with too many notifications from the Zeplin bot…
TIP: Since DALI uses Google authentication, Slack integration is all-time done on a spider web browser. Google hallmark causes a web browser to launch, and Preferences is only available on the web app. 🐛

Adding to the Style Guide
Some of you may know that Sketch has an power to generate a basic manner guide. Refer to this article for more than info.
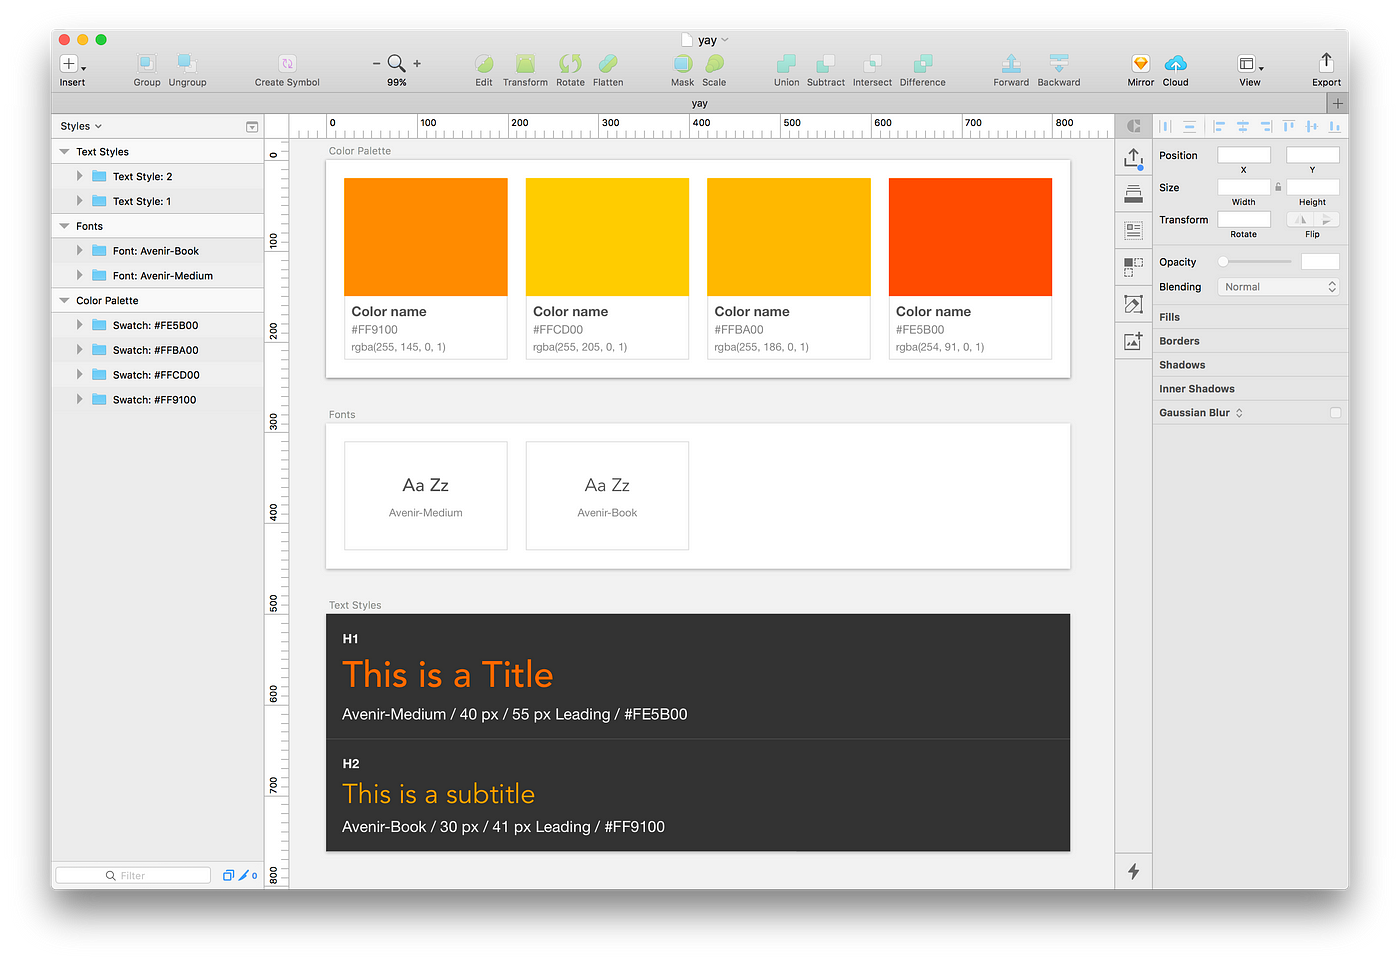
In lodge to include colors and text styles in your Zeplin style guide, you have to specify them equally document-specific. Generating the Sketch style guide (⌘ + ⇧ + C) will automatically discover all colors and text styles, but information technology might add some things that are used only once or is not very significant. You can manually add and delete elements from this listing by following the below:
When you cull colors for a shape or some text, the color picker dropdown will appear. Add colors into document colors by clicking on the + button on the bottom of this dropdown. To remove a color, right click above the specific swatch and select remove.
To add text styles, create a text item with a specific font, weight, color, size. With the item selected, click on the role right above the Typeface option where information technology says "No Text Style." In the dropdown that appears, click on "Create new Text Style " and name it accordingly. Text Styles tin can be edited in the "Organize Text Styles" carte du jour in the aforementioned dropdown.
Defining Assets
👩🎨Designers👨🎨, take you ever had to send your programmer a huge zip file of all the icons, images used in the design and realized that you had forgotten something?
👩💻Developers👨💻, take you ever had to nag your designer on Slack for a missing nugget to implement into your lawmaking?
Well worry non, Zeplin volition take care of all that! 👼
Earlier you export to Zeplin, make sure that you select items or groups that may be used every bit an asset and brand them exportable. This will let Zeplin know that it needs to be considered as an nugget.
To practice this, select the layer from the Layer List and click on "Make Exportable"(Sketch)/"Consign"(Figma) at the bottom of the Inspector (bottom correct corner). In Sketch, an detail that is fabricated exportable volition accept a knife icon side by side to them in the layer listing.
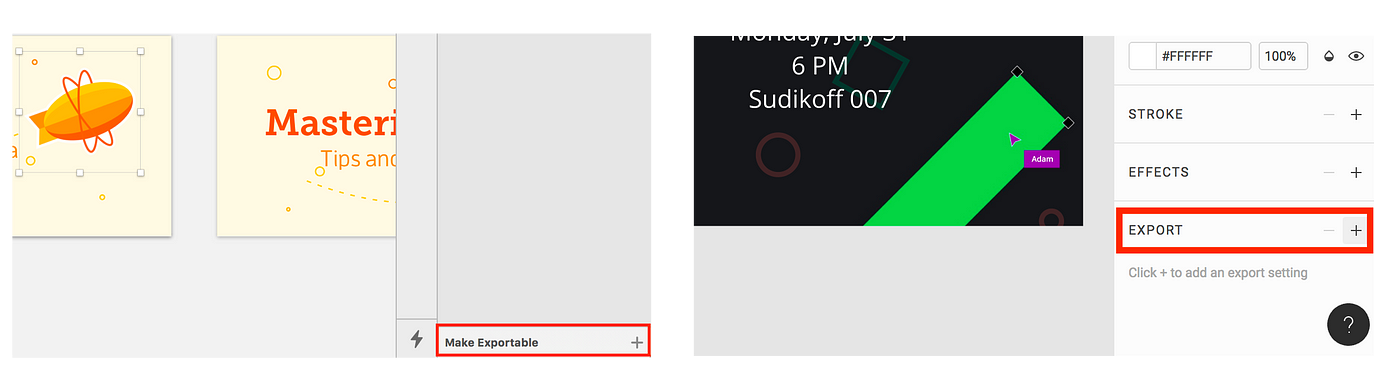
Be sure to **proper noun** your layers clearly and correctly, since the name of the layer will be used as the proper name of the asset when it is exported.

Screen Organizing
Organizing screens is very important when your designs involve multiple features. Just like you can add pages to your sketch file, you lot tin can create sections in Zeplin and drag and drop your screens accordingly. Make a section past hovering in betwixt screens and clicking on the ➗ button that appears.
Zeplin besides has a handy tagging feature that you can use to filter your screens. Add tags to a screen by right-clicking and selecting "Manage tags." In the popular-up, y'all can add together an existing tag or create new tags. The existing tags in the project will be shown at the top of the dashboard for like shooting fish in a barrel filtering.
Style Guide
When you enter a specific projection, you will meet at the very tiptop that you lot are in the Dashboard. Correct next to the highlighted section, there is a tab that says Styleguide.
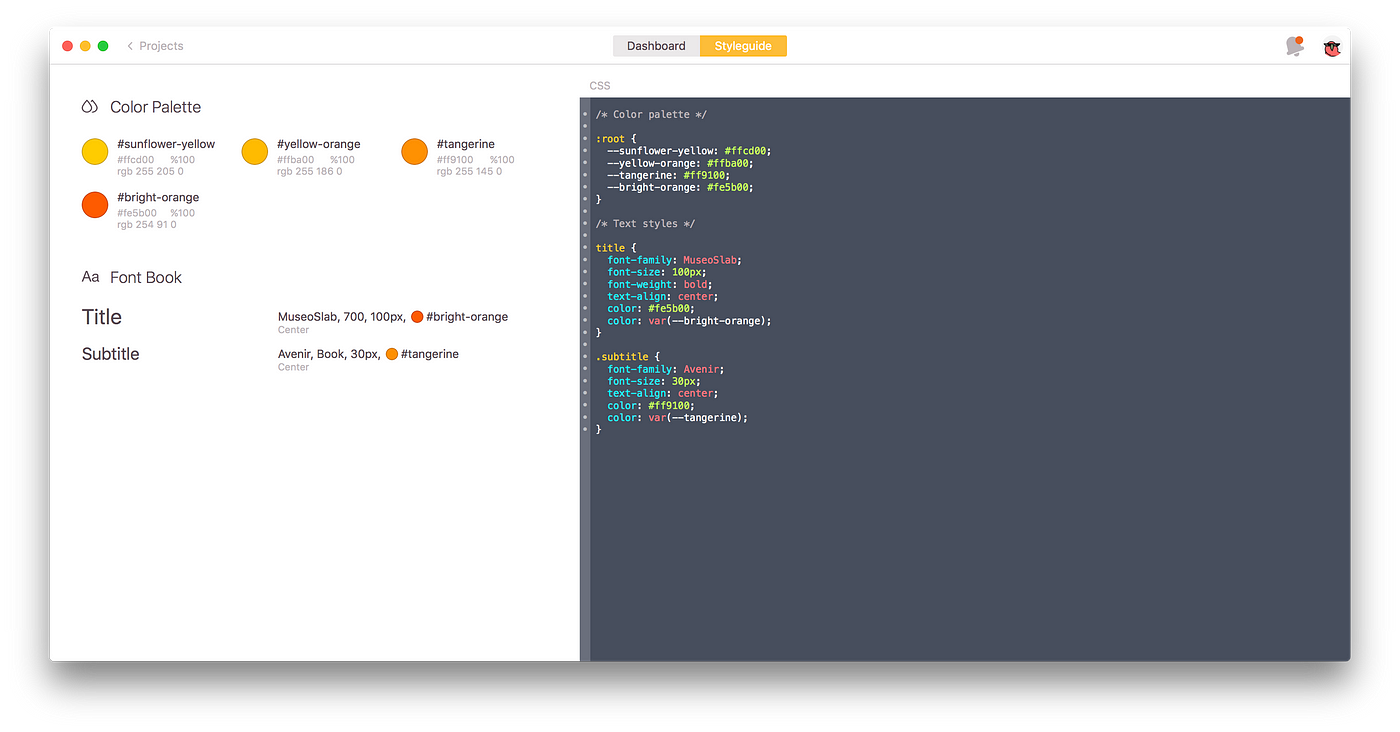
Click on the tab to see the colors and font styles specified in the Sketch file. These styles will be shown in the Inspector when you click on an item in a screen. Color names are generated automatically, merely you can change them hither. Font names will be taken from what yous named them in the Sketch file.
Note how on the right side of the screen in that location is a code department that gives CSS code that developers can use in their manner code. Hover over the part that says "CSS" and click to modify the code language (CSS, Sass etc.) and color format (HEX, RGB, etc.) accordingly.
TIP: If you forgot to add something to the style guide before the export, you lot can add them past clicking on the check marks in the Inspector. Existing colors/typefaces volition have the bank check mark highlighted in orange.
Assets
All the assets within a screen can exist viewed by clicking on the pocketknife icon at the tiptop of the Inspector. Y'all can export all the assets on a screen from this section, or consign a specific detail by selecting it on the screen.
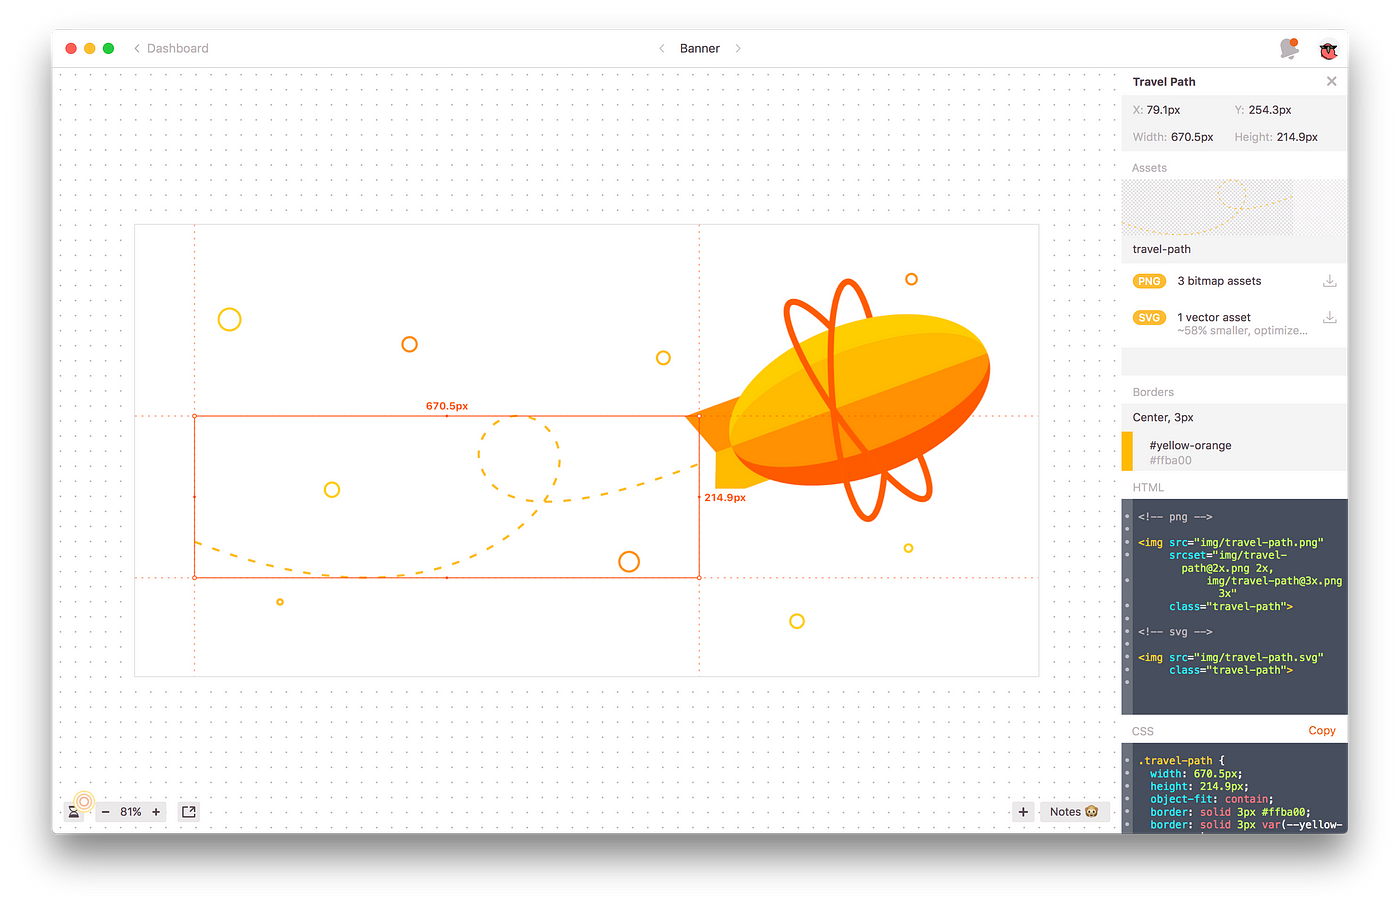
Vector assets will take the option of being exported every bit PNGs or SVGs, and image assets volition take the option of being exported as JPGs or PNGs. Annotation how there is just one vector asset cheers to its resizability whereas bitmap items spawn three assets.
Like I mentioned earlier, names of assets will be adamant past the layer name. The naming convention can also be specified (dashes, camelcase etc.) past clicking on the settings gear that appears when you lot hover over the part that says "Avails."
Commenting
By ⌘+Clicking anywhere on a screen, y'all can add a comment at that location. Later the comment is added, you lot tin can click and drag the circle anywhere you want on the screen.
In that location are 5 colors you lot can choose from, which is handy when you need to organize comments—yous might want yellow comments for pattern reviews, blue comments for developers. You tin likewise tag members in specific comments, and they will be pinged via notifications that can exist seen on the peak right corner of the app.
Comments will take their own threads, so you can answer to a comment to discuss more. Y'all can mark a comment as resolved, which will archive the comment.
Version History
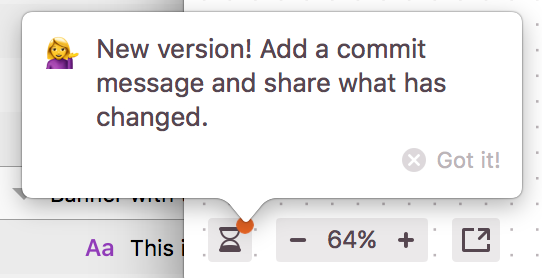
Similar to how Git keeps track of changes in code, Zeplin keeps runway of the changes in individual screens. You can view the history of each screen and even enter commit messages(!) past clicking on the hourglass button on the left lesser corner.
That was my quick intro to Zeplin. I retrieve I covered nearly of the stuff I discover handy, but I'm sure there'due south nevertheless more than to explore. Let me know in the comments if you find whatsoever other tips or features that yous desire to share!
littletonwheme1992.blogspot.com
Source: https://medium.com/dali-lab/a-guide-to-zeplin-9b1c0dbef0b1
0 Response to "How to Upload Screens to Zeplin Project"
Post a Comment